Hello Everyone!
Last Thursday I had the pleasure of attending to the CRM User Group Meeting held at the Microsoft UK Campus near Reading.
It was a great day to catch up and meet lots of interesting people all of them related to Microsoft Dynamics CRM.
Also I participated in the XRM Factor contest that took place early in the morning. Didn’t win unfortunately but it was only because of the incredible level of my fellow contestants and the tools that they presented.
The winner of the first XRM Factor was John Grace with the Universal Search from Sonoma Partners: http://www.sonomapartners.com/Differences/IP/UniversalSearch.aspx
I presented the latest tool created by MVP Ramon Tebar and MVP Rhett Clinton under their DX tools for MS Dynamics CRM:
Dynamics CRM Custom Emails!!
Links
Presentation:
http://www.slideshare.net/slideshow/embed_code/32660438
Download link:
http://crmcustomemails.codeplex.com
What is it?
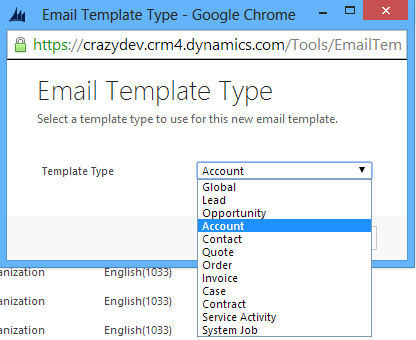
It is a tool that enables the ability of creating email templates and associate them to Custom Entities, out of the box CRM only allow us the following entities:
With Dynamics CRM Custom Emails that limitation disappears.
More Benefits
Yes, it even has more benefits which are:
Within the template you can navigate through any relational level, for example:
Opportunity > Customer Contact > Parent Company
When navigating through the levels you can select any kind of attribute, lookups, option sets, etc…
Another great thing about the tool is the ability to reuse the attachments, so if we are using one attachment in one of our templates, we can reuse it without having to add it again.
Ok and now how can I use it?
Nice and simple:
- Download and install the unmanaged solution, link provided above, following the normal procedure.
- Go to Email Templates and select new, a pop up asking the type will appear, select Global.
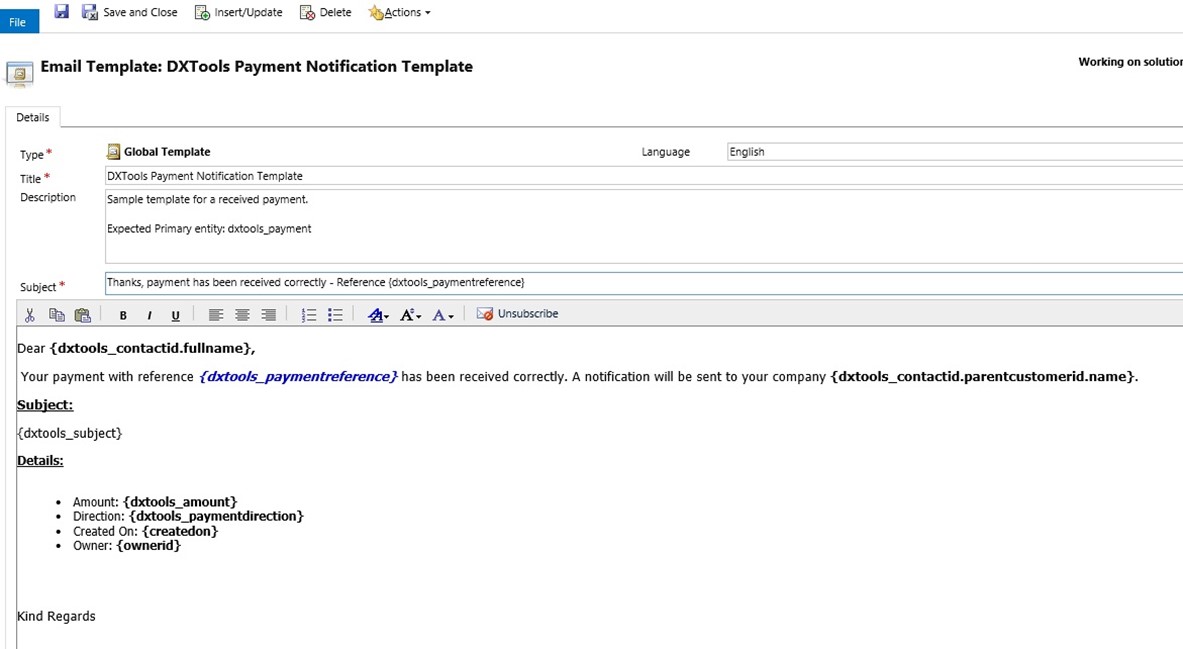
- In the below picture you can see an example of how I am calling the fields that I want them to be on the template, it is important to remember to add the fields between {}
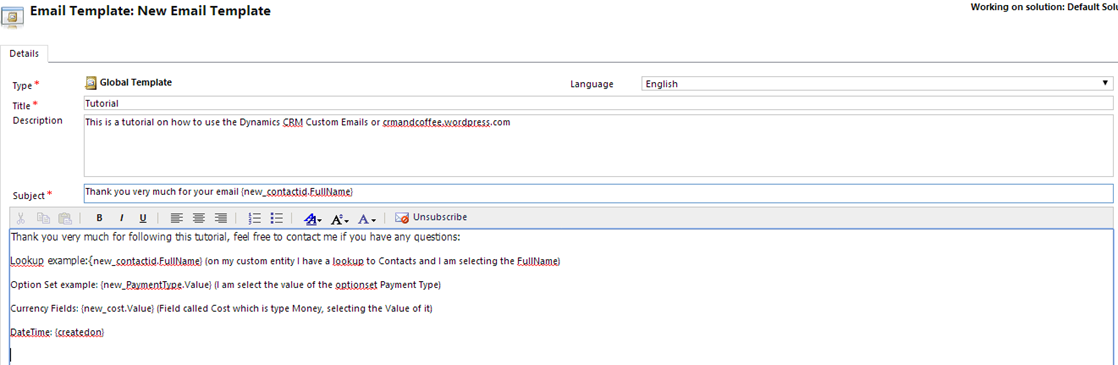
- For the attachments, do not include anything on the template, we will select them later when using it.
- Save and Close the template, everything is ready!
-
Right now that we have our template we need to start sending emails using it, for that we are going to create a Workflow that will use one of the Custom Steps that the tool provides us:
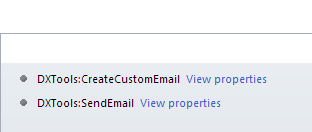
- The first Custom Workflow Activity will create the Custom Email using our Custom Template, the second one is the responsible for sending the email.
-
Let’s start explaining the first one:
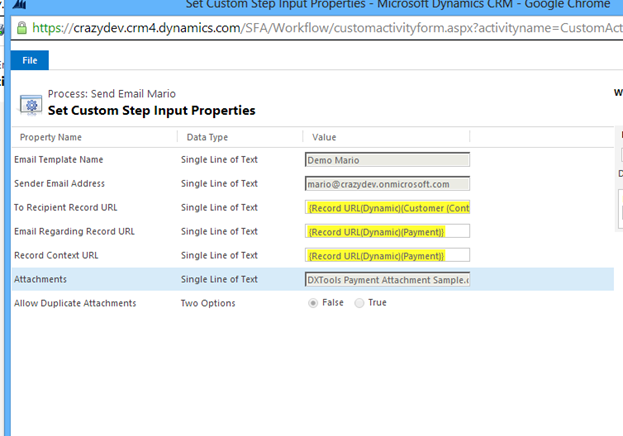
- Email Template Name: Yes, that’s it just the name of the Template.
- Sender Email address: The email address under which we are sending the email.
- To recipient Record URL: The person that we want to receive the email, important this is not a lookup field, this is a record URL field. In order to retrieve that field we will need to select it from the right menu.
- Email Regarding Record: The regarding that we want the email to be associated with.
- Record Context URL: Another cool thing is that the regarding and the context of the email can be completely different, for example you can associate an email to a payment entity, that will be the Email Regarding Record, and the context of the email to the contact associated to that payment.
- Attachments: Here is where the magic happens, just type the name of the Attachment, yes just the name, and the tool will automatically look for a match on the system and use that one, it doesn’t matter in which other template it is.
- Allow duplicate Attachments: What about if the attachment that we selected above is duplicated? Well in that case we can select if we want both or not, in case we select False it will throw an exception if more than one match is found.
-
Well, we are almost there, now let’s send the email!!

- Existing Email: Here we need to select the email that we created with the previous Custom Workflow Activity.
- Issue Send: False for Sending the Email Automatically, True for going through the process of Pending Send -> Sent
- Tracking Token: Here we can add a tracking token.
- And that’s it!!
Some examples

Hope this tutorial helps, if someone has any questions please feel free to leave them as comments, I promise to reply to every single one of them.
Also I would like to thank everyone involved in organising the CRM UG UK and the other speakers as well, it has been a great experience and I am already looking forward the next one!!
Thanks,
Mario


Leave a comment